Back to the Defender 110 Section
1993 NAS Defender 110 Station Wagon #383/500
Complete restoration/ modernization, with Pursuit 4.6, automatic gearbox
and much more

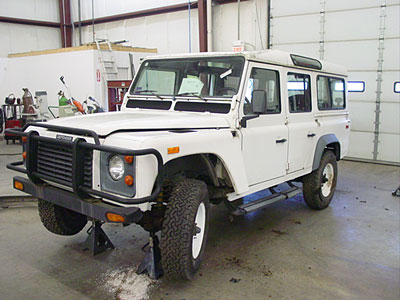
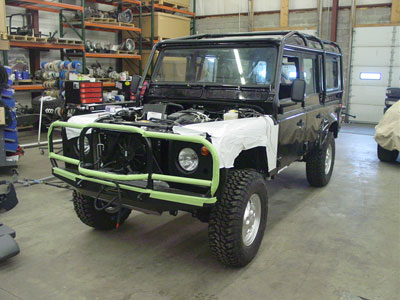
This NAS (North America Specification) Defender 110 Station Wagon has come to us from Washington state. The 110 has well over 140,000 miles and has some serious corrosion issues. The owner of this 110 decided it was time for a complete restoration and upgrade. To make this 1993 110 into exactly what the customer desires we will be doing a full restoration, as well as adding some tricks and upgrades that the NAS 110s never had. We will be installing a Pursuit 4.6 EFI V8 mated to a ZF automatic transmission, power windows, power door locks, and we will be doing a full color change to all Black. This will be one stunning 110 when completed, perhaps the most up-scale Defender 110 we will have created to date.

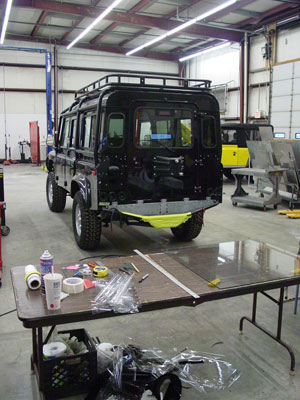
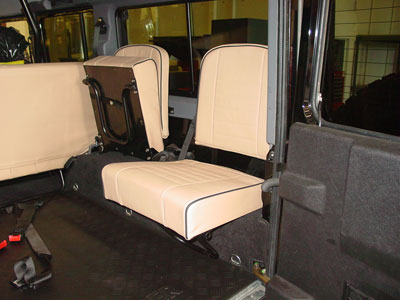
The first order of business on this Defender 110 is to gut the interior. Here you can see we have removed all the seats. These seats will now be sent to Shoreham Upholstery for factory style recovering, but this time in tan leather with black piping, with seat heaters built in. While the seats are away being re-done we will continue to tear down the 110 to figure out what we can and can not use.
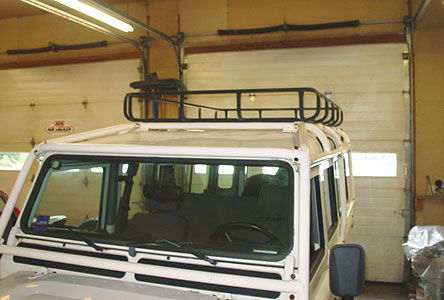
Next up is to remove the safari cage from the 110 and media blast it all back to white metal in order to remove all the old powder coat and any rust. Then we will powder coat the entire cage in stain black so that it will match to exterior color on the 110 once it goes back into place.
Once the cage parts are removed it is time to strip down the 110 to the frame and catalog what is good and what is bad. Due to the corrosion on the steel parts of the 110 we will be utilizing all new steel parts so that there is no rust in our new build up. That means a new bulkhead, new doors and more.
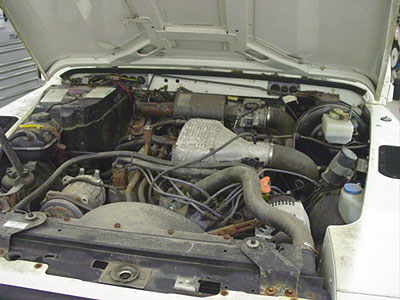
In the engine bay we removing the original 3.9 and all the running gear in order to restore what we can restore and toss what we can't. The 3.9 will get stripped down and the ancillary parts will be used on the new 4.6, but anything that is a moving part will be replaced with new in order to make this a true restoration, not just a paint job and some new tires like some other places.
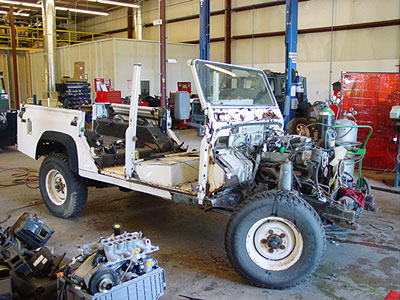
Here you can see the 110 strip down a little further along. Everything comes off and apart in a frame up restoration, so we are about half way there in the tear down at this stage. When we say restoration, we mean it. It isn't a word we throw around for just any project.
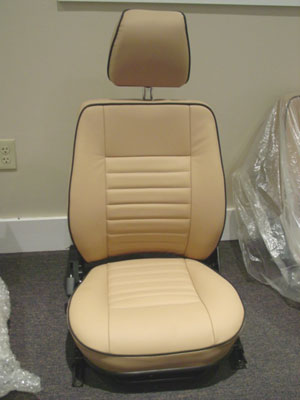
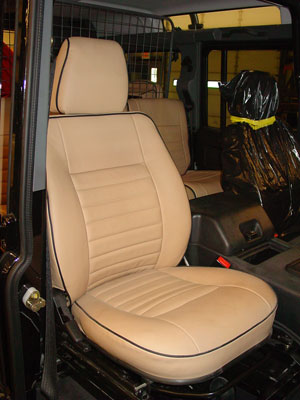
As we continue to strip down all the running gear and rebuild the axle and suspension parts with all new bushings and bearings the seats have returned, and they look great. The guys at Shoreham Upholstery do all our interior soft trim work and you can see their fabulous work all over our web site. These new tan leather seats are top notch and even have seat heaters and all new foam under the leather so that everything will last long term. These seats inside the black 110 will look great, but before we can install the seats we have to construct the body.
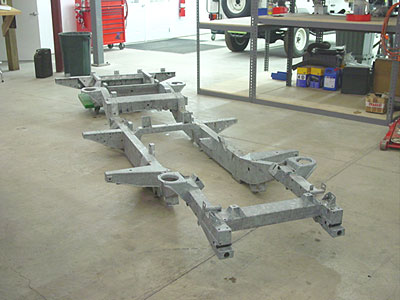
Here you can see the back bone of the restoration, a new galvanized chassis. This will meant that rust will not be an issue again for this 110s frame and that means a long lasting 110.

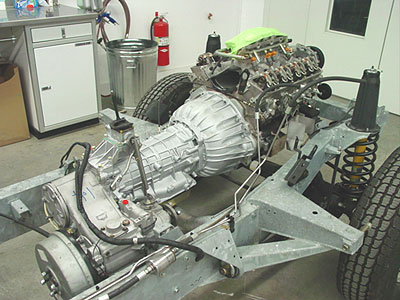
After the axles and such are rebuilt they are installed onto the new frame to create a rolling chassis. Along will upgrading the front brakes to vented rotors and converting the rear axle to disc brake instead of the stock drums, we are also using some upgraded springs for a mild suspension lift and Bilstein shocks for better ride and handling. While this frame is being made into a rolling chassis other work continues all over the shop on this project. Our in house paint shop is busy putting the primer and paint on the new steel parts and the mechanical side is busy setting up the new 1.4 ratio transfer case and the ZF automatic (you can see the gearbox and transfer case going together in the background). Next up we will get all the new stainless steel brake and fuel pipes installed on the frame and then start to construct the body.
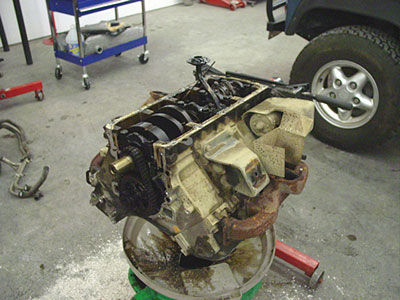
As the crew gets the rolling chassis together the old 3.9 V8 is pulled aside and put on an engine stand and stripped down. The non-moving parts will be cleaned and restored, but the moving parts of the engine will be replaced with a brand new Pursuit 4.6 (not a rebuilt motor). Once all the old parts are off and cleaned up we will toss the old 3.9 and begin to set up the Pursuit 4.6.
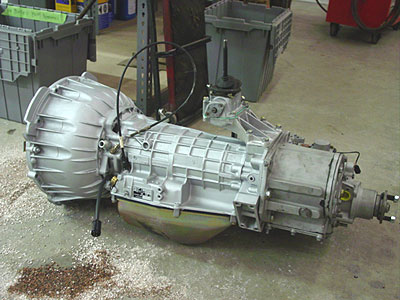
Here you can see the heavy duty ZF automatic gearbox has been mated to the LT230 full time 4x4 transfer case and all the linkage systems have been installed and tested. Unlike other's automatic conversions we set our restored automatic 110s up correctly with all the safety systems. The starter inhibit switch will work on this 110 as will the shift interlock (not allowing you to grind the gears in the transfer case by shifting it when the gearbox is in drive or reverse) and the gearbox will be tied into the EFI system so that the engine know when a load is being put on it by the gearbox. This eliminates the idle "flare" or surge that comes in other's auto conversion as they do not fully integrate the automatic into the Defender. There is much more to it than just installing the gearbox and to make it work seamlessly everything has to be correctly done.
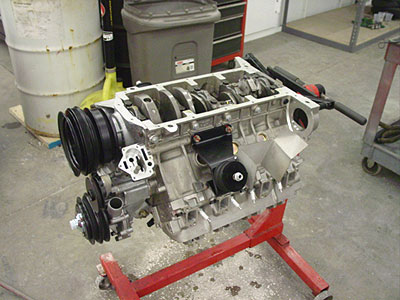
The old 3.9 has seen its days and here you can see the new Pursuit 4.6 being set up with the new and restored parts. Pieces like the motor mount brackets have been primed and painted and then new isolators installed. The water pump and other wear items, like the timing cover are all replaced with new Genuine Land Rover parts. Nothing is left unturned in a true restoration.
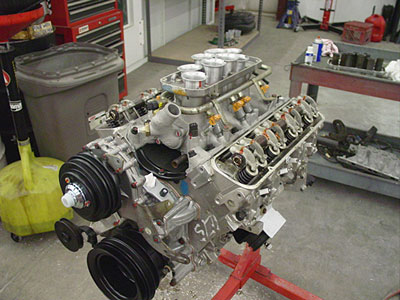
This image shows the top end of the Pursuit 4.6. The engine is now nearly complete and with just a little more work will be ready to mate to the ZF automatic and then be installed into the galvanized frame.
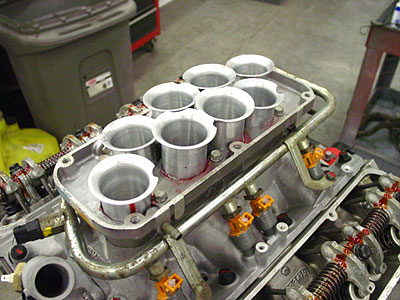
Here you can see a close up of the intake on the Pursuit. It allows more air into the engine with its modified air intakes and the new upgraded fuel injectors will help all that air become more power when things are running. Next up we will bench pre-lube the engine in order to assure a smooth start up once the engine is ready to fire in the engine bay.
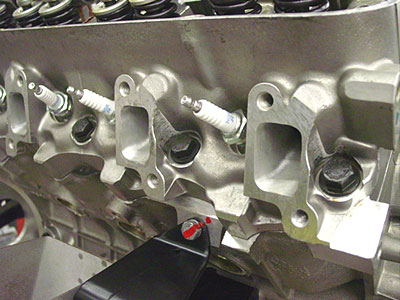
All that air going in has to go out as well in the form of exhaust. Here you can see the modified cylinder head on the Pursuit 4.6. The larger openings are gasket matched and will mate up perfectly to our modified exhaust manifolds that have been coated in Jet-Hot ceramic coating for reduced under hood temps and faster exhaust gas movement. The manifolds will then be mated to our 304 stainless steel exhaust system to complete the package.
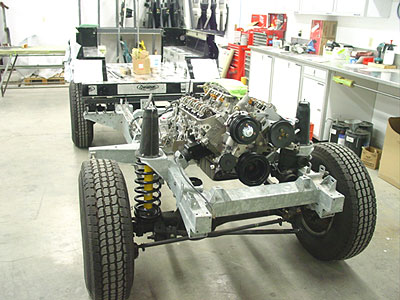
This image shows the new drive-train installed into the rolling chassis. You can also see the new stainless steel fuel lines are in place and will now bee hooked up to the fuel rail on the engine. Next up the stainless steel brake pipes will go into place and then the newly painted body panels will start to go into place.
Here you can see the rear body tub has been restored and painted in the cool black color that will set this 110 apart and installed on the frame. At this stage in the build up we will also mock up the rear jump seats so that we can build the subwoofer boxes that will hold an 8" subwoofer on each side, but unlike stereo shops our subwoofer boxes will not be seen and will not take up and extra space in the cargo area. All the seating and cargo storage area will remain, you'll only hear them in the great quality sound, not see or have to deal with them.
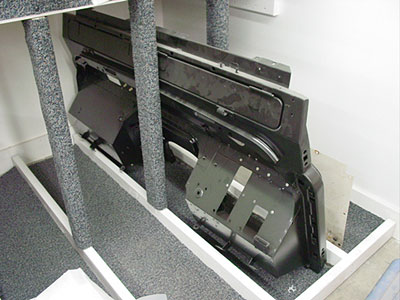
This image shows the new bulkhead. As we have stated before, we do not use old and potentially rusted steel parts in our restorations. The steel parts are all replaced with new factory parts as you see above. This gives us two great benefits over fixing up a used rusty bulkhead. First, we know that all new steel means no rust, and we take extra care in epoxy priming and painting these parts so that they will be long lasting, and second the new bulkhead means that we are not stuck with some of the shortcomings of the NAS 110s bulkhead. In using a new bulkhead we can utilize the vent flaps and all the new style dash parts with ease to make the interior of the 110 a much nicer place to be.
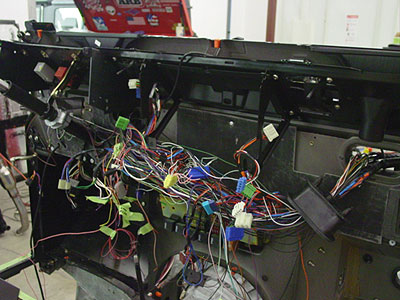
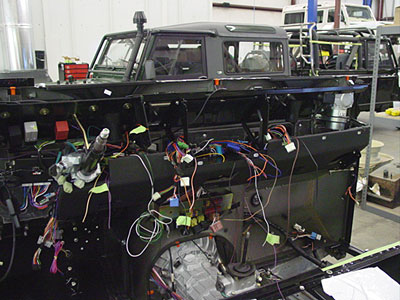
Here you can see the bulkhead is out of our paint dept. and has been loosely installed onto the frame. At this stage it is time to start wiring up the 110, but because the owner of this 110 wants it fully upgraded that means a lot of custom work for the electrical system. This truck will have power locks, power windows and will be EFI with an automatic. Land Rover never made a harness that did all that, so we start with a late model harness and modify it to be what we need. In the middle of the job it looks like a spaghetti mess...
but a little while later the harness has been tamed, wrapped and all the circuits tested. Now that the wiring is under control we can start to add the upgraded dash parts that will make the interior of this 110 so much nicer than the original, as shown above. This Defender will also have a GPS system via an Alpine touch screen head unit and JL Audio speakers, so we will now start pulling all the audio/video wires and cables to make sure everything is in place and appears built in, instead of added on. In the left of this image you can also see the new Viper alarm system that will handle the keyless entry and more in the Rover has been installed and wired up.
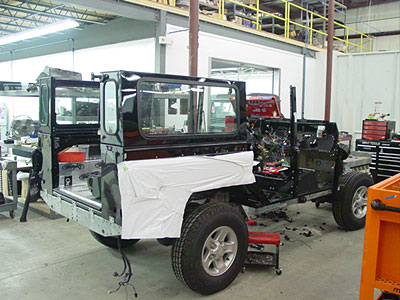
As the bulkhead starts to get buttoned up the steering parts go together and the rest of the newly painted body panels start to make their way onto the Defender and it really starts to look like a truck again. Next up will be the new stainless exhaust system and then we will finish up the body and start to assemble the roll cage that is just back from powder coat.
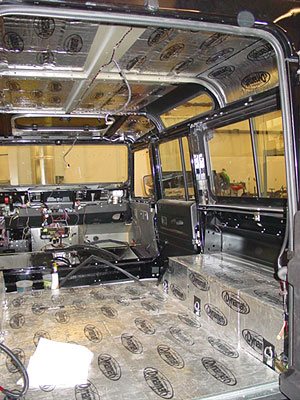
Here you can see that the majority of the body has been assembled and we have added a layer of sound reduction material to make the inside of the 110 as quiet as possible. At this stage we have also pre-run all the stereo wiring for the upcoming sound system, and as you can see the doors are now in place. Next up we will start installing the interior trims and those luxurious leather seats.
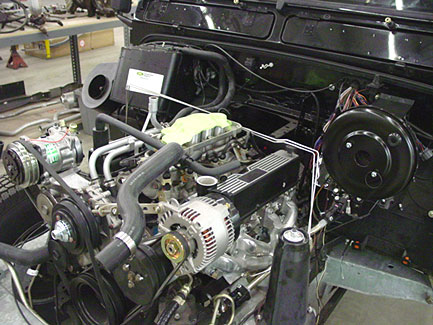
This images shows the new Pursuit 4.6 coming together. We have treated it to some black accents to make it look at home in the engine bay of this black 110 and started to hook everything up. You can also see the new stainless steel brake pipes that are about to go into place to go along with the longevity theme of this NAS 110. You can also see that none of the moving parts on the engine are used or refurbished. Once completed this truck is to be like new and that means new water pump, AC compressor, alternator and more.
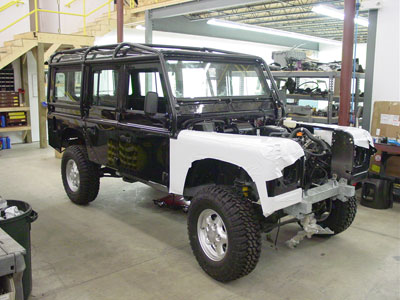
Here you can see the front clip has been installed, and then the fresh paint wrapped in protective white film so that it stays in top condition. We have installed the correct alloy wheels as well now, with a set of G/Y MTRs for good manners both on and off the road.
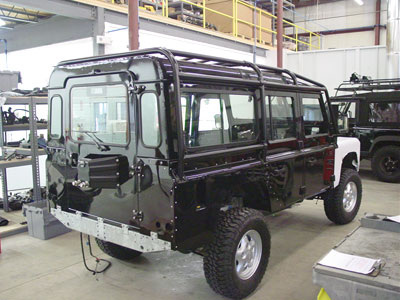
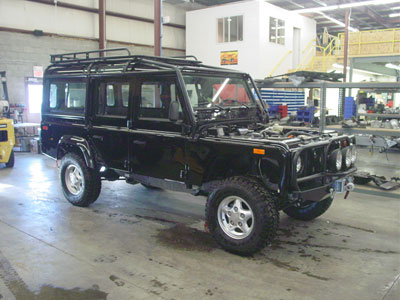
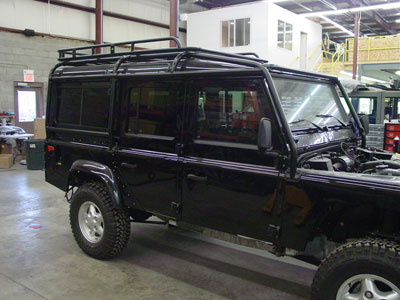
The safari cage has come back from powder coat and has now been installed onto the truck, as seen in the image above. The roof basket isn't on this truck yet, because it will be an ECR roof basket, not the stock unit. This will mean much a much more capable rack system, just like our roof systems for Defender 90. Go here for ECR rack information. Next up we will install the custom subwoofer boxes and start getting everything hooked up so that we can fire up the new Pursuit 4.6.
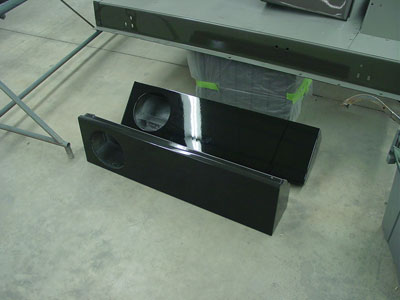
Here you can see the new subwoofer boxes that will hide behind the jump seats in the rear of the 110. They have just been primed and painted in Black in our in house paint department. These will give great sound to the system from the two 8" subs and won't take up any useable room in the back. Modern slim-line subwoofers now allow us to hide subs in places where we never could before, giving the customer better sound with a more factory look to the installation.
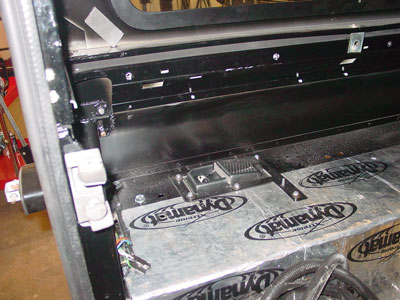
Before the sub boxes can be installed we have to install the rear AC system into the LH rear fender well. The image above show the rear system is in place under the fender and new we will install the interior duct work that will allow this 110 to have front and rear AC. More images of the completed rear AC install shortly, but now it is time to mock up the ROX sliders to help protect the sills of the truck while off roading.
While the sliders are being fabricated and painted it is time to continue on the body and exterior of the 110. The ROX tie rod guard and HD drag link have been installed, as well as the ROX front bumper and skid plate.

Here you can see the ECR roof rack basket we have fabricated for the 110. It is much more flexible as it will accept any Yakima rack product and has built in locations for work lights, Hi-Lift jacks and more. It can also accommodate a roof top tent, offers a lower profile for garage parking and it just plain looks better than the stock roof basket.
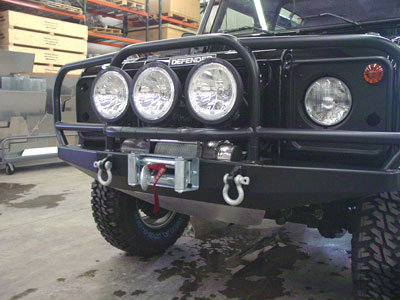
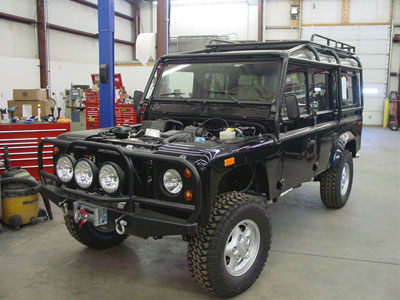
We have also run all the wiring for the three Hella 4000 driving lights, installed and tested them and also installed the Warn 9000 winch along with the recovery points on the front. The upgraded Hella headlamps have been installed as well, so this 110 won't have any trouble seeing in the dark. Next up we will get the 110 ready for initial road tests.

Here you can see 110 after some in shop testing. The engine is now up and running with a new Tornado EFI computer chip installed and all the mechanical system have checked out. Now it is time to start getting all the small items installed, like the ECR LED tail lights. The owner of this 110 wanted to update the look a little, so we have tossed the stock 1993 rear lights and have installed the wiring and plinths for the 95-97 NAS style lights, as well as running the wiring for a rear work/reverse lamp.

Inside the rear of the truck the subwoofer boxes are in place along with the all new black carpets and rear cargo area tie down points. Once the subs are installed and tested we will install the beautiful tan leather rear jump seats, but because they are so nice we are going to be holding the seats out until last... just in case.

Here you can see the rest of the interior coming together. The side window trims and headliners are all installed, along with all the small trim pieces. The new style rear door has also been installed and all the door seals are on and the doors have been lined up to be able to open and close easily.
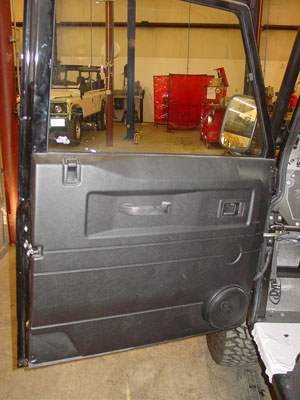
Speaking of doors, here you can see the front door has had its interior parts assembled and a new JL Audio speaker has been added to each front door for great sound. The new black door panel has been installed and all the power window systems have been installed and tested. All five doors to the Station Wagon have now been completed.
Here you can see the 110 up and running under the power of its new Pursuit 4.6 and automatic gearbox and it is looking fantastic. Next up we will install the ECR ROX sliders that have just come out of the paint booth and start installing the audio/video system.
Today the window tinter is here at the shop and the windows of the the Black 110 are being tinted to the customer specification. Once the windows are done we will install all that beautiful tan leather interior and get the truck buttoned up.
Here you can see the new 3M window tint installed. It looks darker than it really is because of the lighting inside the shop, but it is a nice set up that will help keep the 110 cooler in the sun and isn't so dark you can't see out.
This image shows the front end coming together. The front lighting is done and all the steering upgrades are in place. Next up the front flares will go on so that some road testing can begin.
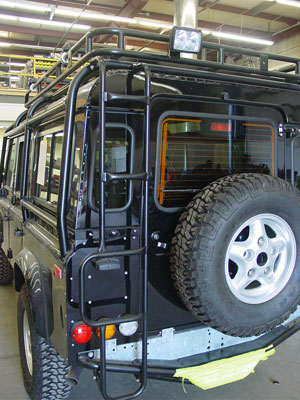
The rear lighting changes are buttoned up as well. The LED lamps are installed and the Hella twin bulb work/reverse lamp has been installed along with the factory rear ladder that has been zinc and black powder coated.
Now that the tint is done the interior is taking shape as well. The new rear jump seats and seat belts have been installed. The stealth 8" sub-woofers are now completely hidden, but they still sound great and the truck doesn't look like it has a big audio system in it, even though it does. You can also see that the HD floor mats are starting to go in as well.
The seats will end up getting custom seat covers, but this seriously trick looking leather will be hiding underneath.
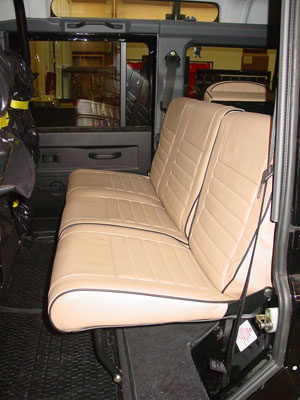
Here you can see the new 60/40 bench that has the same pattern and color leather as the fronts and rear jump seats.

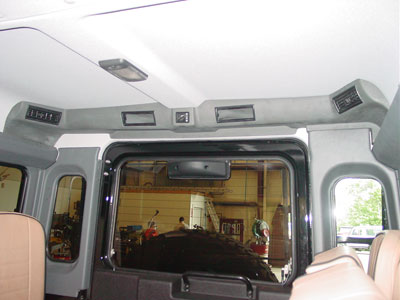
The updated headliners and twin interior lights have been installed as well and the interior is now nearly together.
This 110 also has rear air conditioning to help take the edge off the rear passengers or cool down the dogs. A removable dog guard will be installed as well to help keep the dogs safe in the event of the worst case.
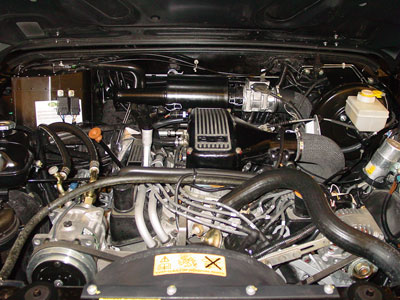
Here you can see the completed engine bay with the Pursuit 4.6 set up mated to the ZF automatic. This set up helps the 110 move the way it should and gets rid of the underpowered 3.9 completely.
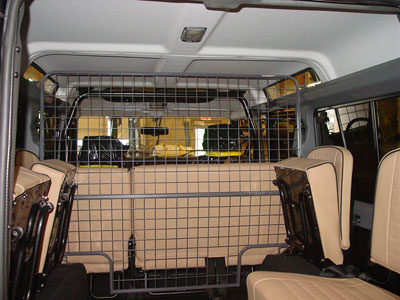
This image shows the dog guard installed and all the seats in and done. Next up we will clean everything up and install the seat covers and the rest of the audio/video system.
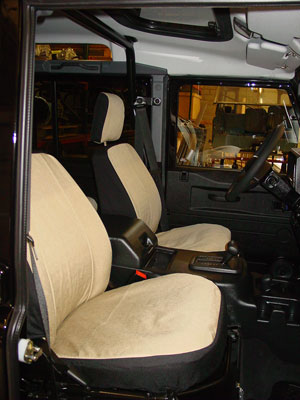
Here you can see the custom seat covers in tan. These help keep the seats protected and still give a nice custom feel to the interior because they are not the standard color.
The Alpine touch screen audio/video/Navigation system is now complete and it has everything from a direct iPod connection to touch screen navigation and even a rear view camera.
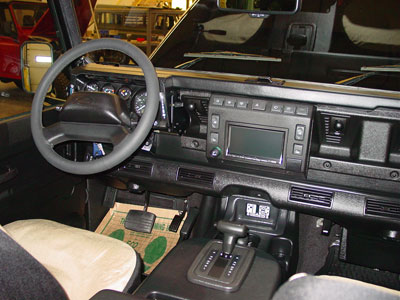
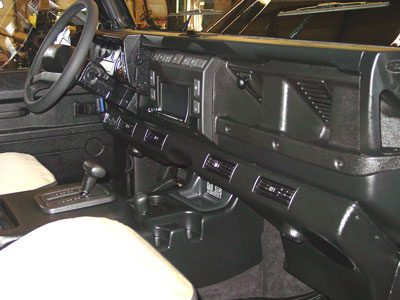
Here you can see the finished dash section with the touch screen navigation system and leather wrapped steering wheel. Our goal is to make our custom trucks look like the factory could have built them, and this 110 is another example of a Defender 110 that the factory never built, but we have made it all look correct with even better than factory fit and finish.

This image shows the black 110 all cleaned up and ready for transport out to Washington State for decades of faithful service to its owner. The truck sports everything from a galvanized frame to a Pursuit 4.6, rear air conditioning to a touch screen navigation system and so much more. This 110 truly is one of the best, if not the best, Defender 110 in North America with no corners cut and absolutely nothing left undone in the complete restoration.
If you have Defender needs, anything from a new set of door hinges to a complete restoration of your 110, contact ECR. We'll be happy to make your Defender world class... just like this one.